Over the years, players have designed custom maps and changed the way people view Minecraft. Onnowhere, a brilliant programmer, designed a functioning Minecraft chatbot that expands its language capabilities as players talk to it. The team over at Mental Block Gaming designed one of the most popular puzzle maps of all time titled "There is No Learning Curve!" And one of the most popular Minecraft maps of all time, Diversity, was designed by a father and fellow map-maker that goes by the name of qmagnet.
Minecraft is used today in classrooms to educate students, in architecture projects to create mock walkthroughs for blueprints, and even in tech camps to help introduce students to STEM careers! Mojang couldn't have possibly imagined the game to be this incredible!
In this guide, I will show you how to install a Minecraft Java map on your computer for Singleplayer. Note: Multiplayer is a tad more complicated, mainly since you have to either use your own router (and have networking knowledge) or find a third party hosting company (such as Nodecraft, Aternos, etc.) to help you out. Also, this tutorial is for a Windows 10 machine.
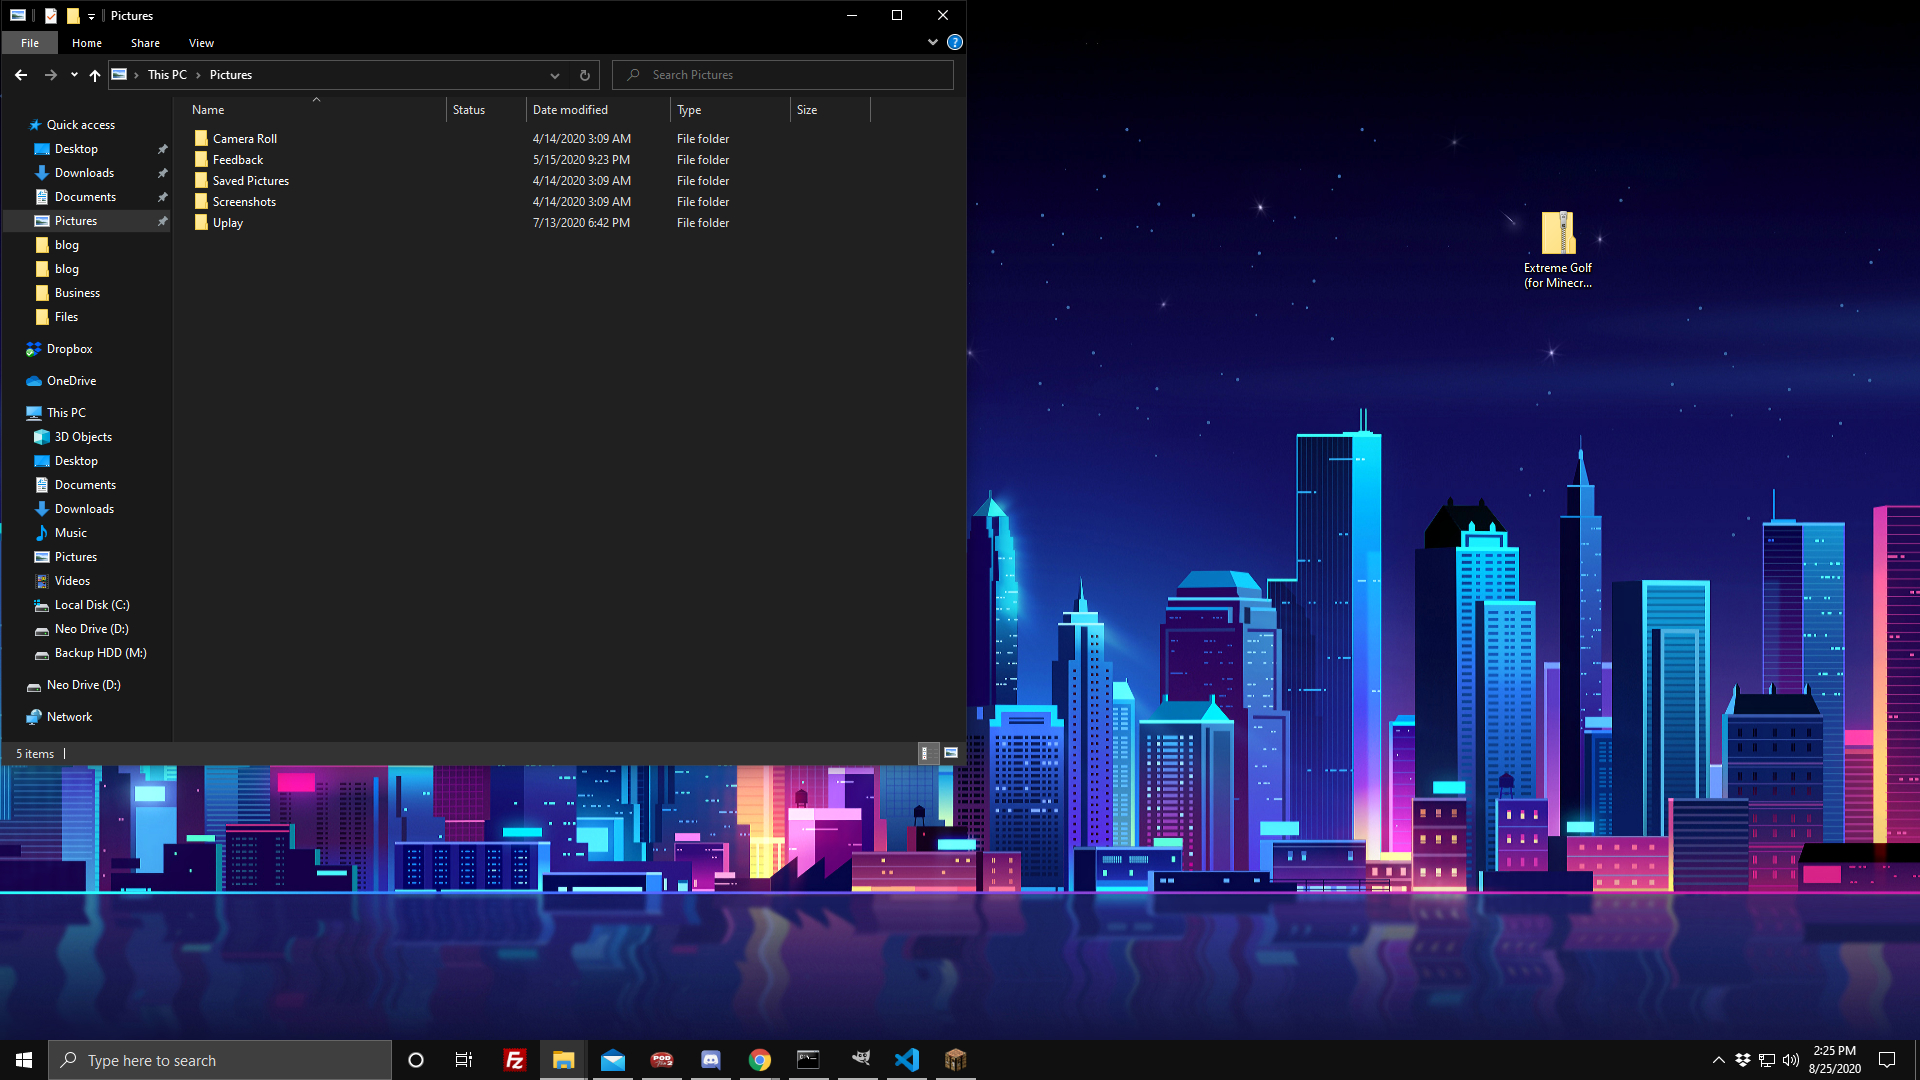
In this guide, I will be installing a map made by a friend of mine, MrGarretto's Extreme Golf. You can check it out here.
Step 1 - Show hidden files
Minecraft installs itself in a hidden location in your AppData files. In order to find it, you first need to allow your computer to show hidden files.
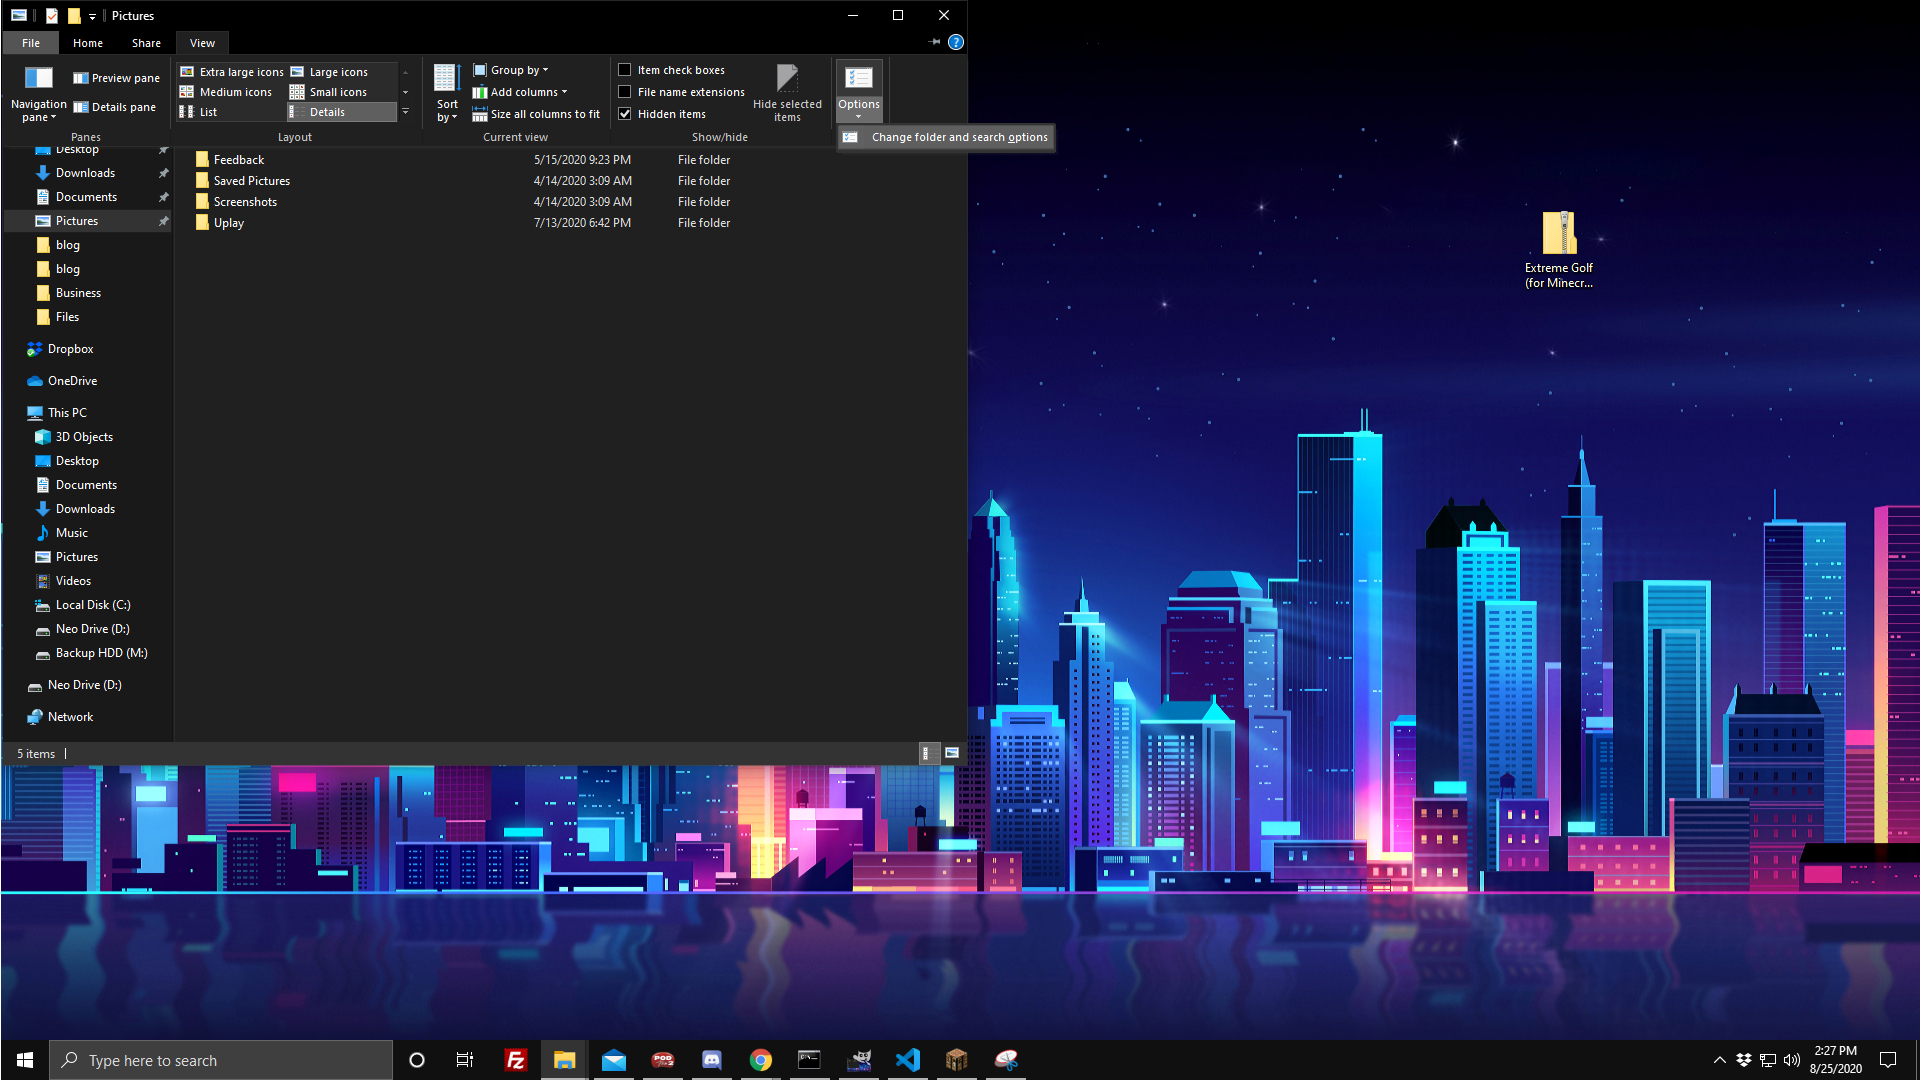
First, open Windows Explorer on your computer. Not Internet Explorer, but the files window. Next, navigate to the top of the page and find the View tab. Click on it. At the end of the bar that appers, there is an Options button. Click it and click the option from the dropdown that says Change folder and search settings.
A new window will pop up. Navigate to the View tab and scroll down to the Advanced settings pane. Make sure the show hidden files, folders, and drives option is ticked and not the option above it.
Now the Minecraft saves folder will appear when we look for it.
Step 2 - Navigate to the .minecraft folder
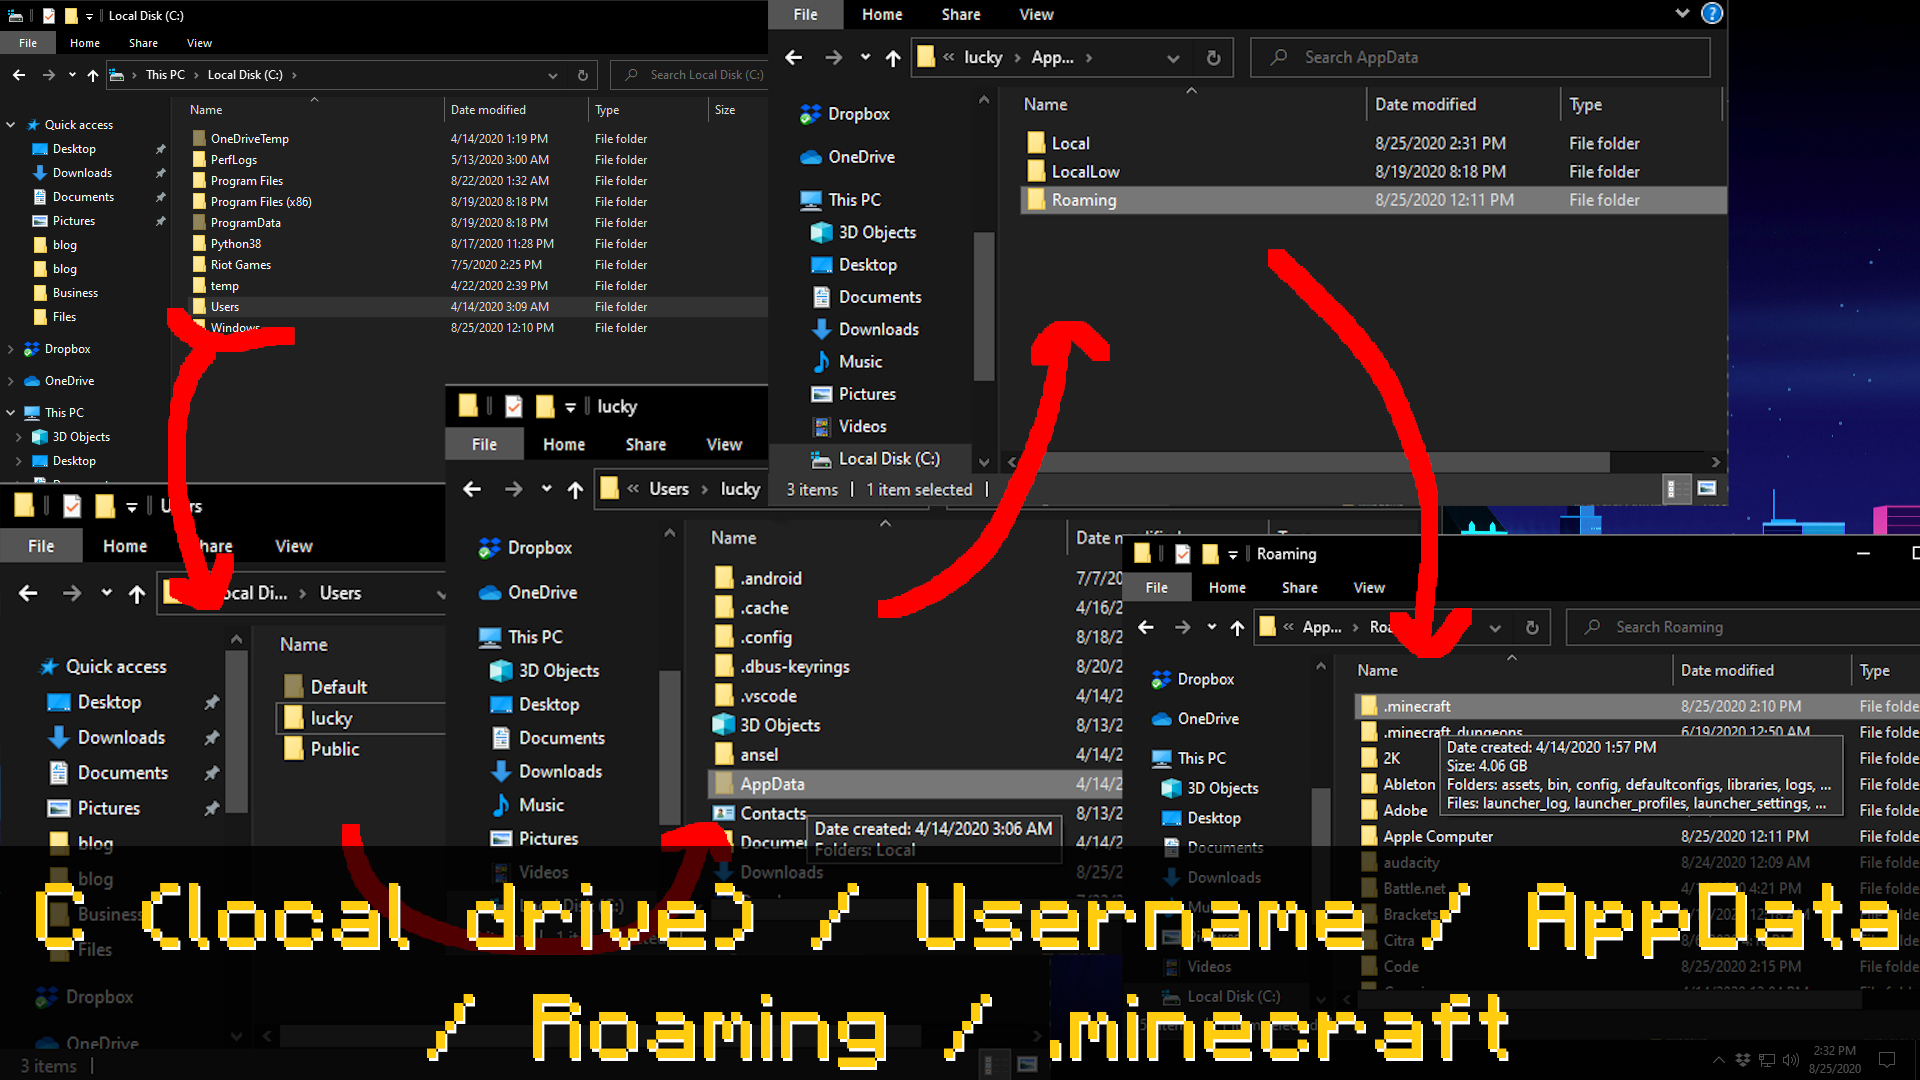
Now we are going to locate the Minecraft saves folder. First, open a new instance of File Explorer and click on This PC. From there, click on the option called Local Disk (C:). Note that your drive may have a different letter assigned than C. Now, reference the picture above and navigate through the following file path:
- First click on Users
- Next, click on your account name. My user account name is "lucky."
- After that, you will click the folder titled AppData. This folder is hidden by default on Windows machines, hence why we had to unhide it in Step 1.
- Next, select the Roaming folder.
- At last you should see the .minecraft folder appear. Click on this folder.
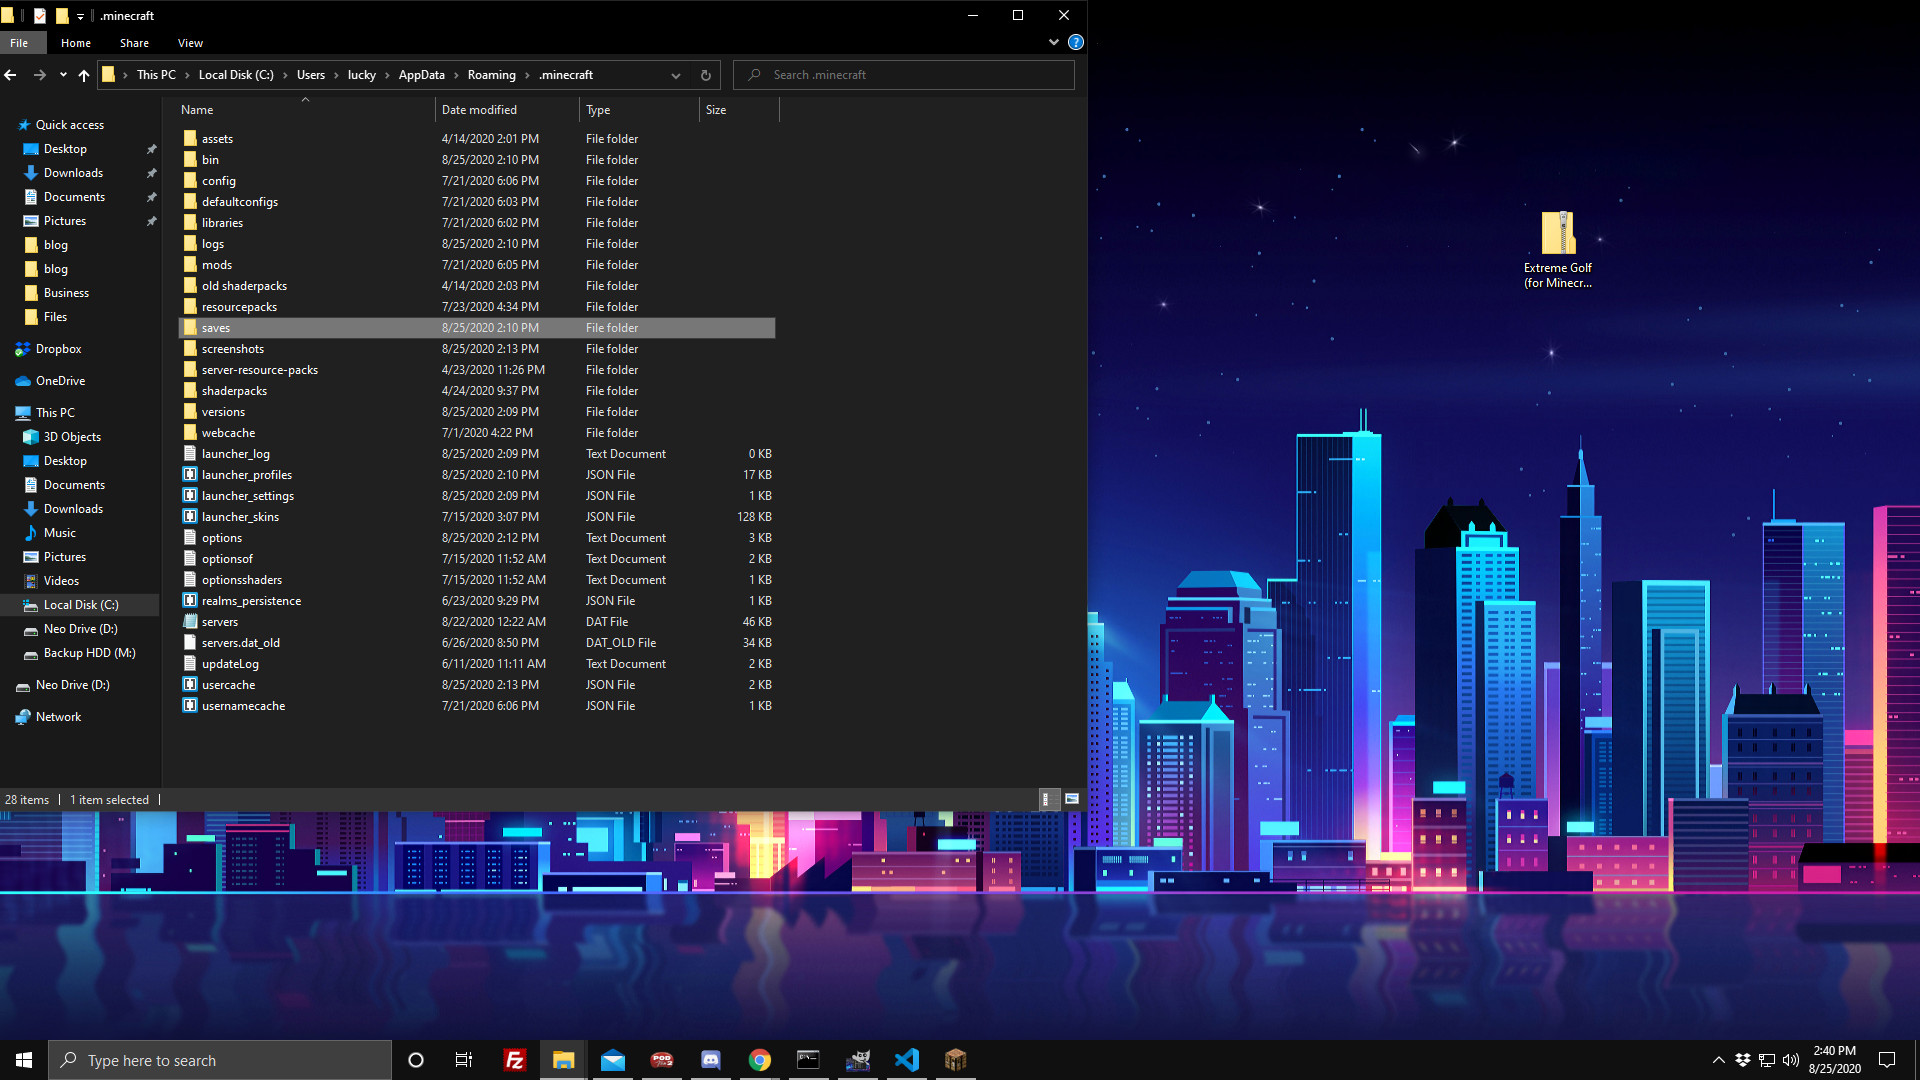
Now you will see a multitude of different folders. The screenshots folder stores pictures taken in-game by pressing F2, the saves folder is where custom worlds are located and stored, and the other folders such as shaders and mods are for mods such as Optifine and Worldedit. Click on the saves folder. You are now at your destination!
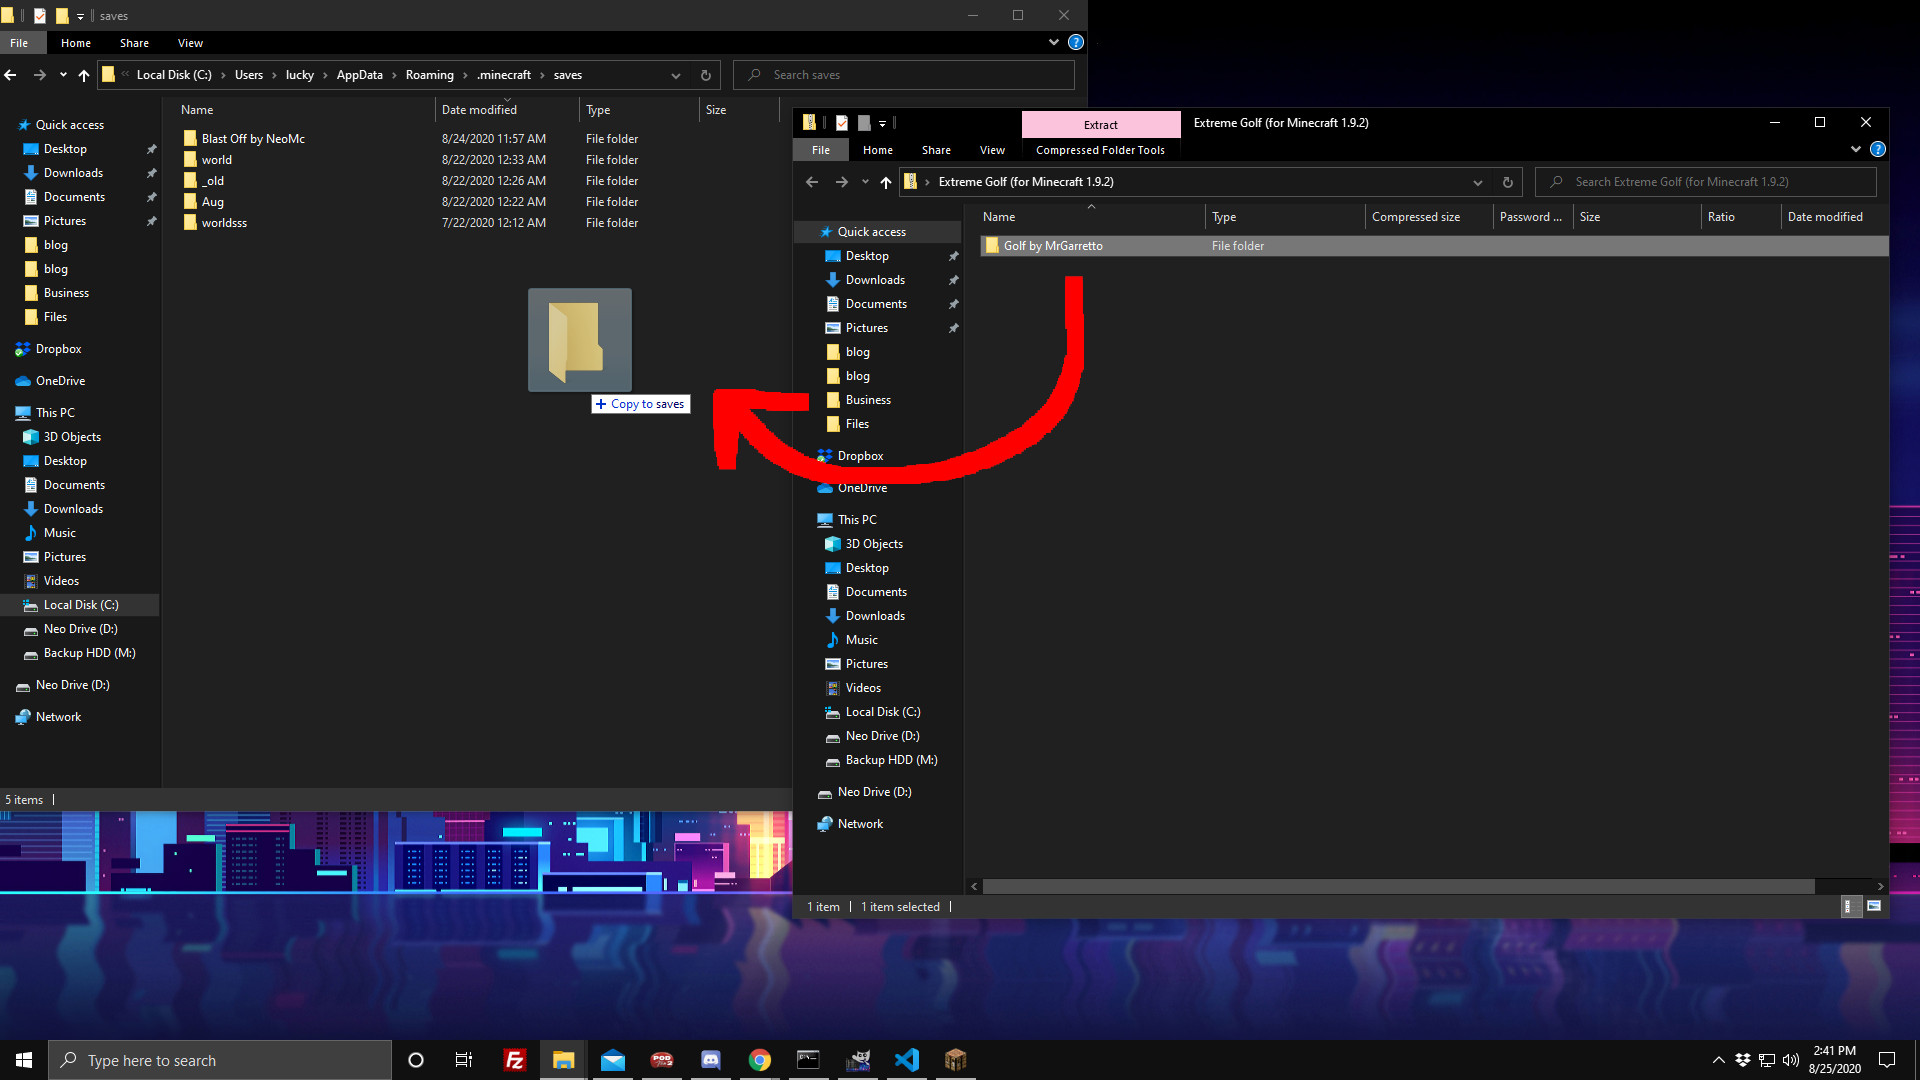
Step 3 - Copy the world in
The last thing you need to do is to copy the new world in. Most people distribute world files in the form of a compressed file, usually with a suffix of .zip or .rar. You may need to extract the files with a different software (like 7zip) if you cannot get the option to pop up while right-clicking the file on your Desktop.
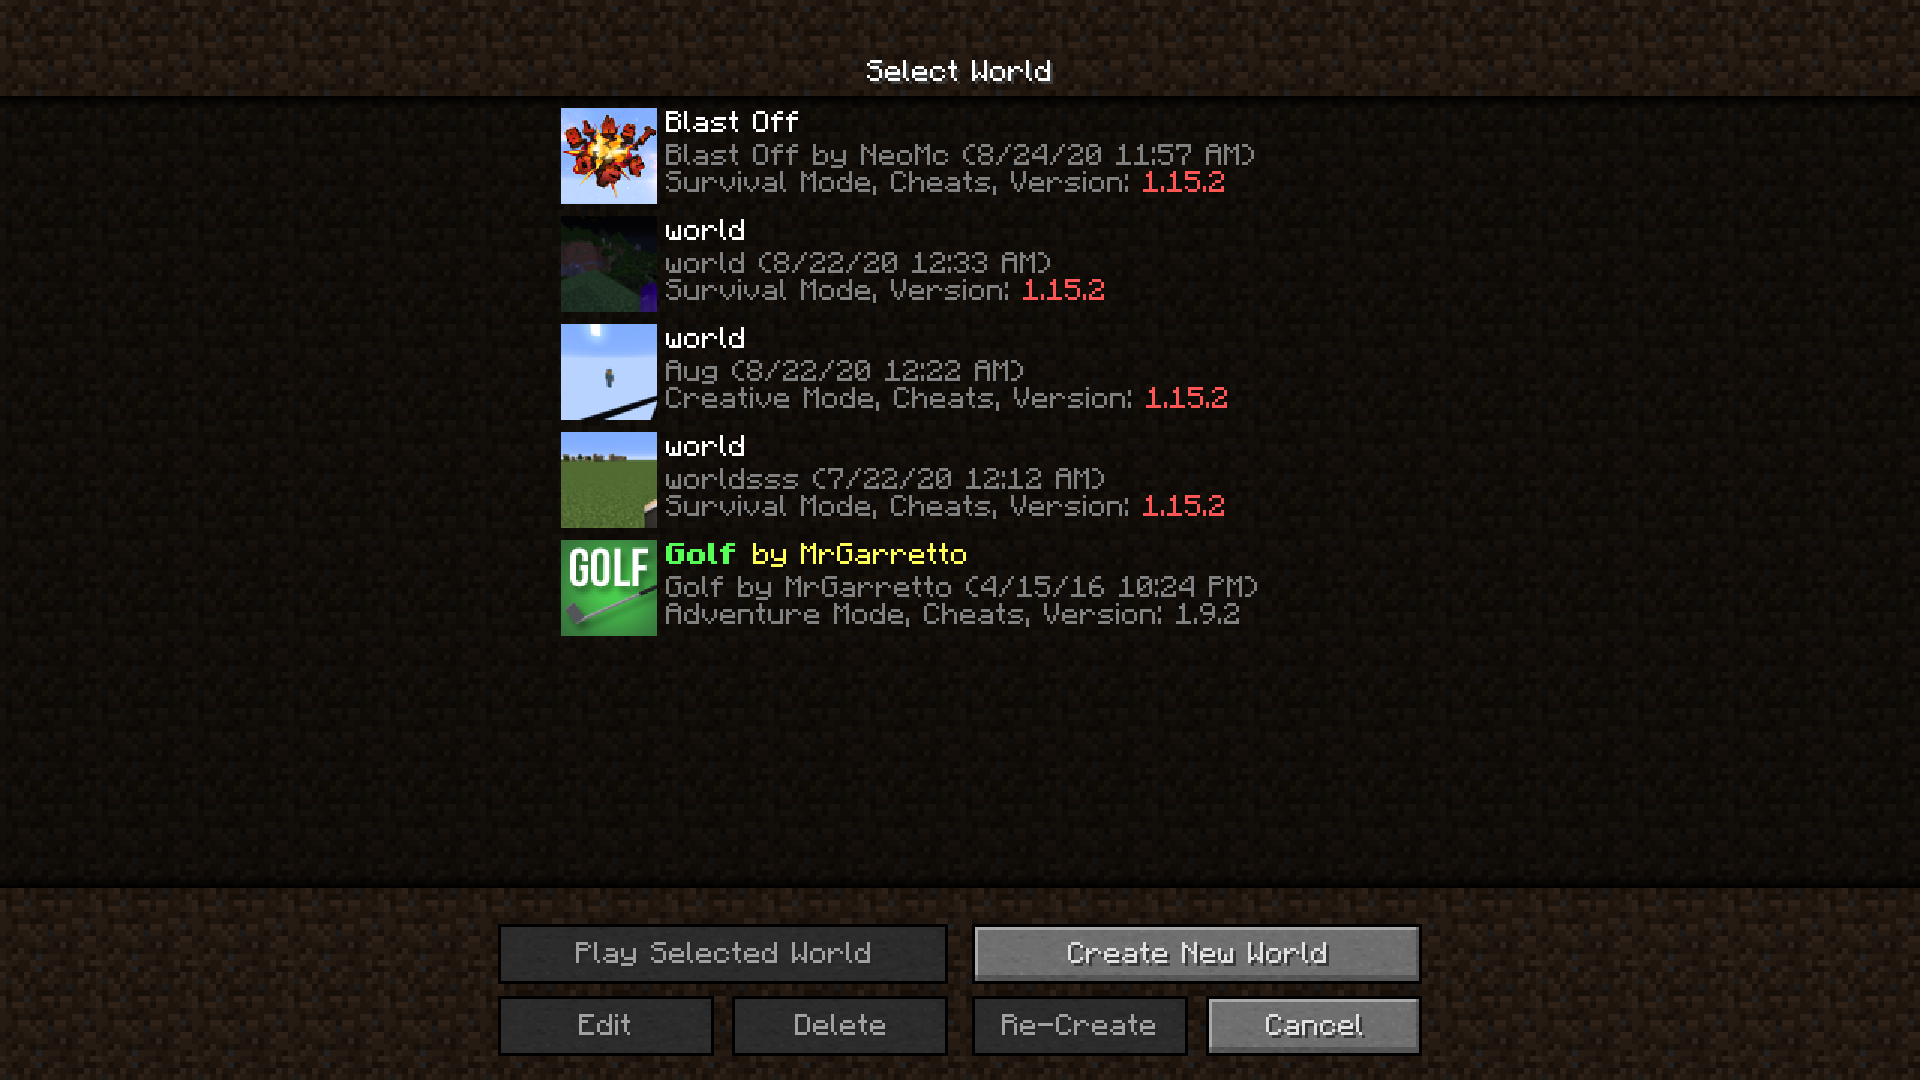
Go ahead and open the extracted folder (or the zip if on a Windows machine). Drag the folder inside into your .minecraft/saves folder. Next time you check inside your singleplayer worlds, you should see a new world loaded!
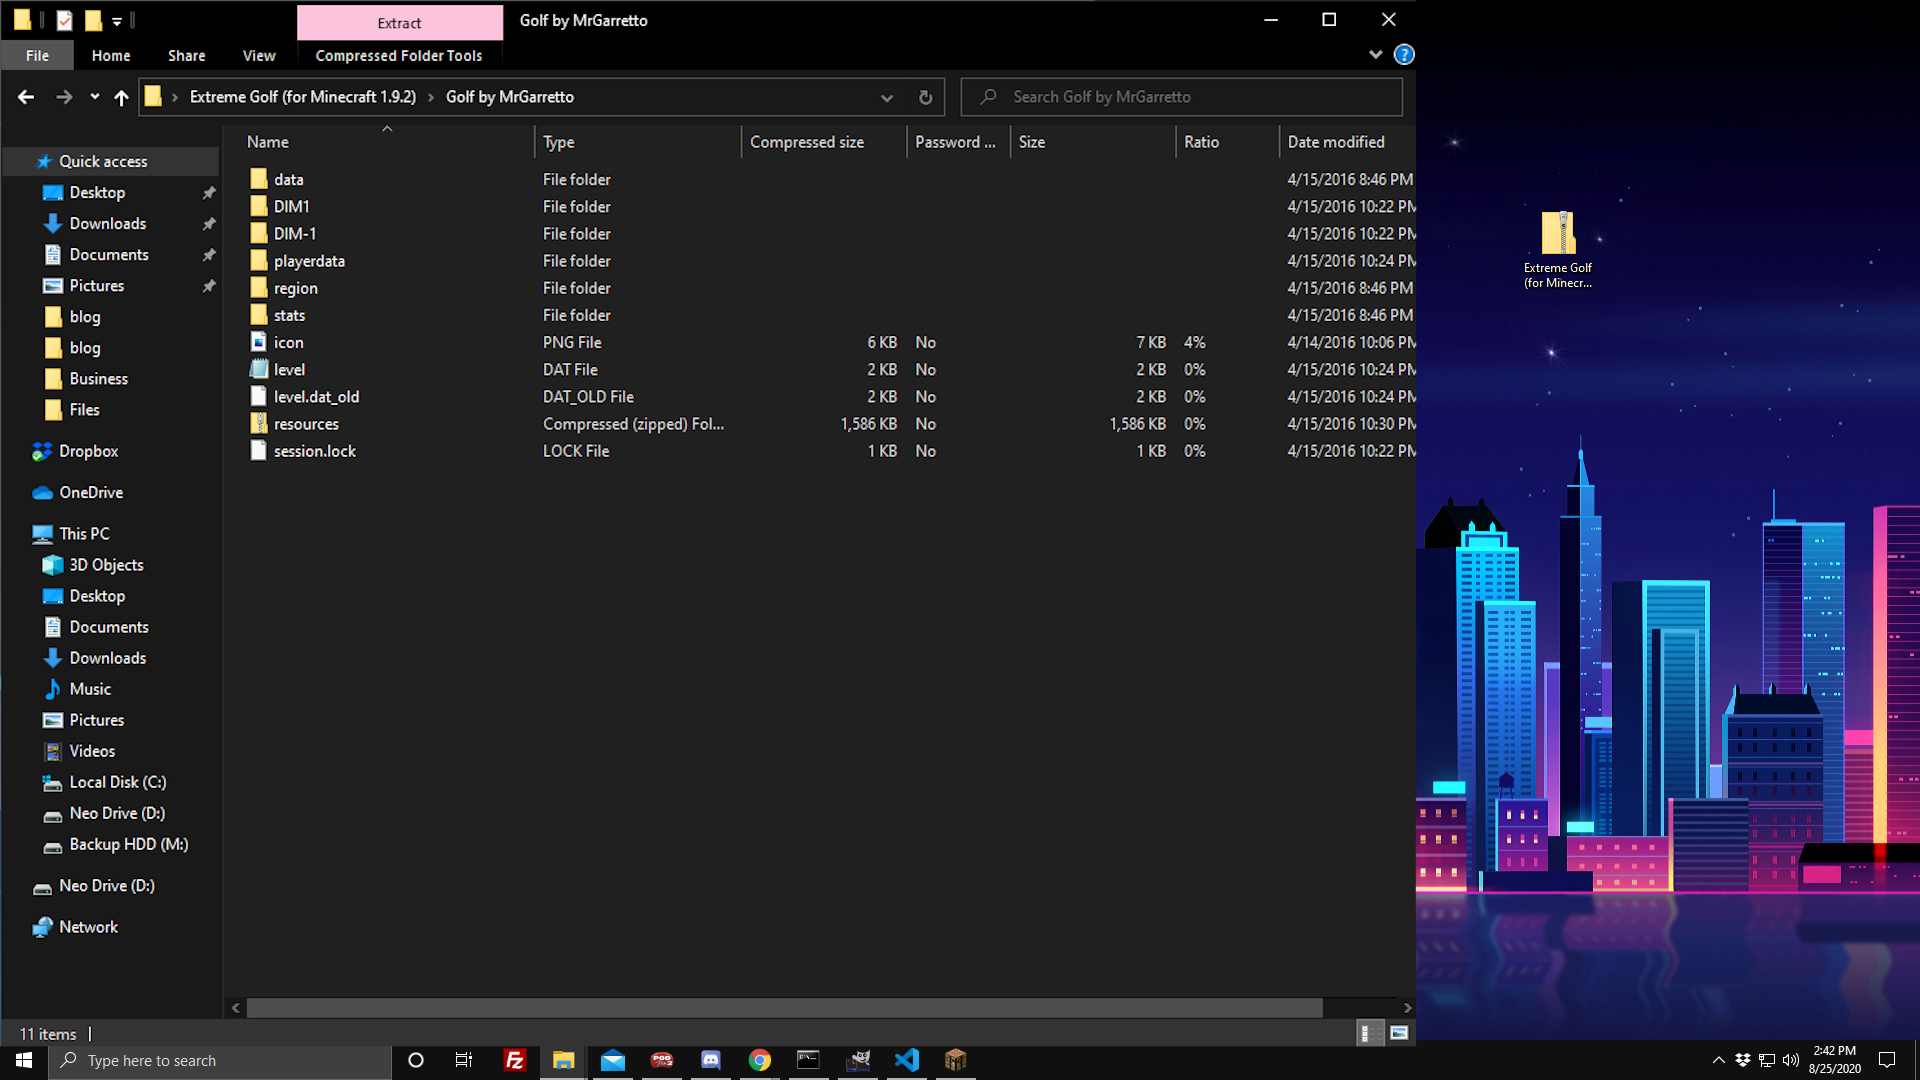
Note: Make sure the folder you drag into the saves folder has files such as level.dat, region, and data folders inside. These must be located, or else the world might not be a valid world. It is also possible the mapmaker buried the folder root down several layers (for example, Chunk.zip has the folders Chunk>Chunk by Neo>World File before you actually see the data files). Double check that as well if the world isn't popping up.
Once you have verified the folder contains a level.dat (and other world files), you can go ahead and boot up Minecraft.
I highly recommend setting a shortcut to the .minecraft/saves folder on your Desktop, it tends to help speed up time. Right-click on the saves folder, scroll down to Send to, and select Desktop (create shortcut). Voila, now you have a quick shortcut to jump back to that folder anytime!
And that is how you install a custom map for Singleplayer! You can also use a LAN inside of the game to play with siblings on the same wifi if you wish!
Have fun playing the map!